

- Jill
Questions
0
Answers
121
-
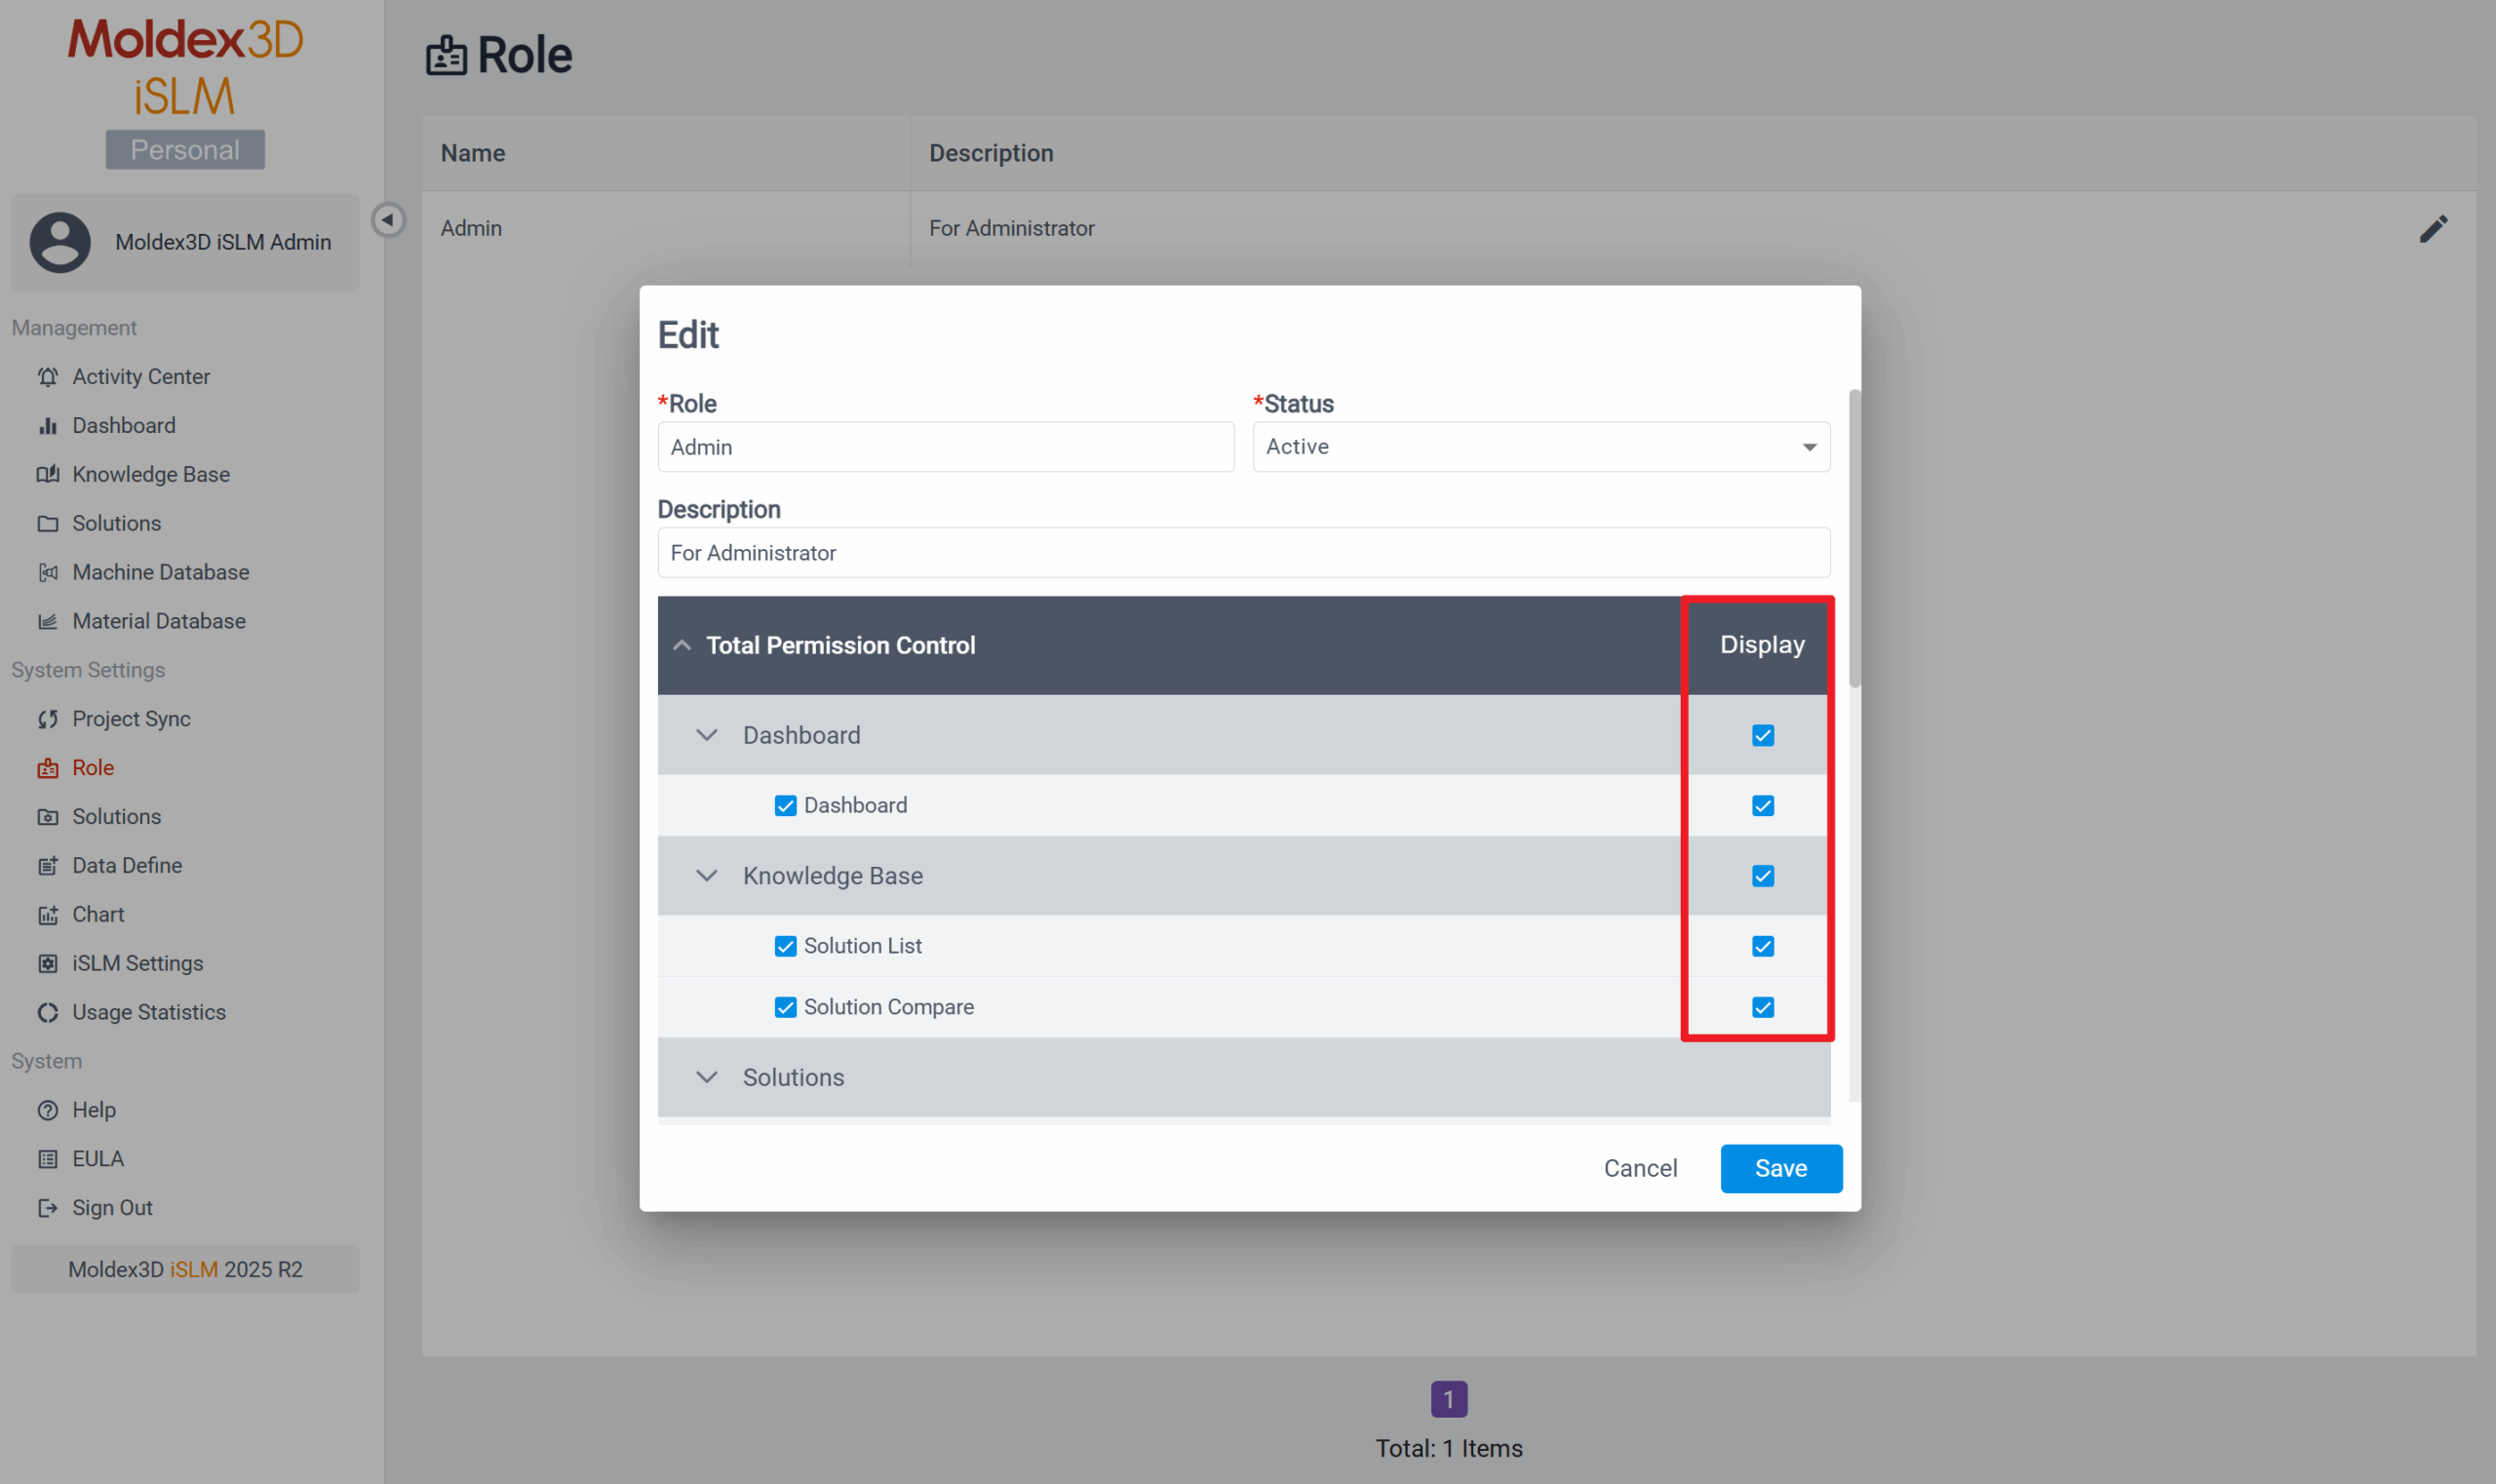
iSLM – Personal Mode 目前能檢視並使用的功能項目為:
Management: Activity Center、Dashboard、Knowledge Base、Solutions、Machine Database、Material Database
System Settings: Project Sync、Role、Solutions、Data Define、Chart、iSLM Settings、Usage Statistics
System: Help、EULA、Sign Out
*若發現沒有以上功能,請點擊 Role 並確認是否已將所有功能的瀏覽權限開啟;若無開啟瀏覽權限,則在側欄功能選單上並不會出現該功能名稱。
- 363 views
- 1 answers
- 0 votes
-
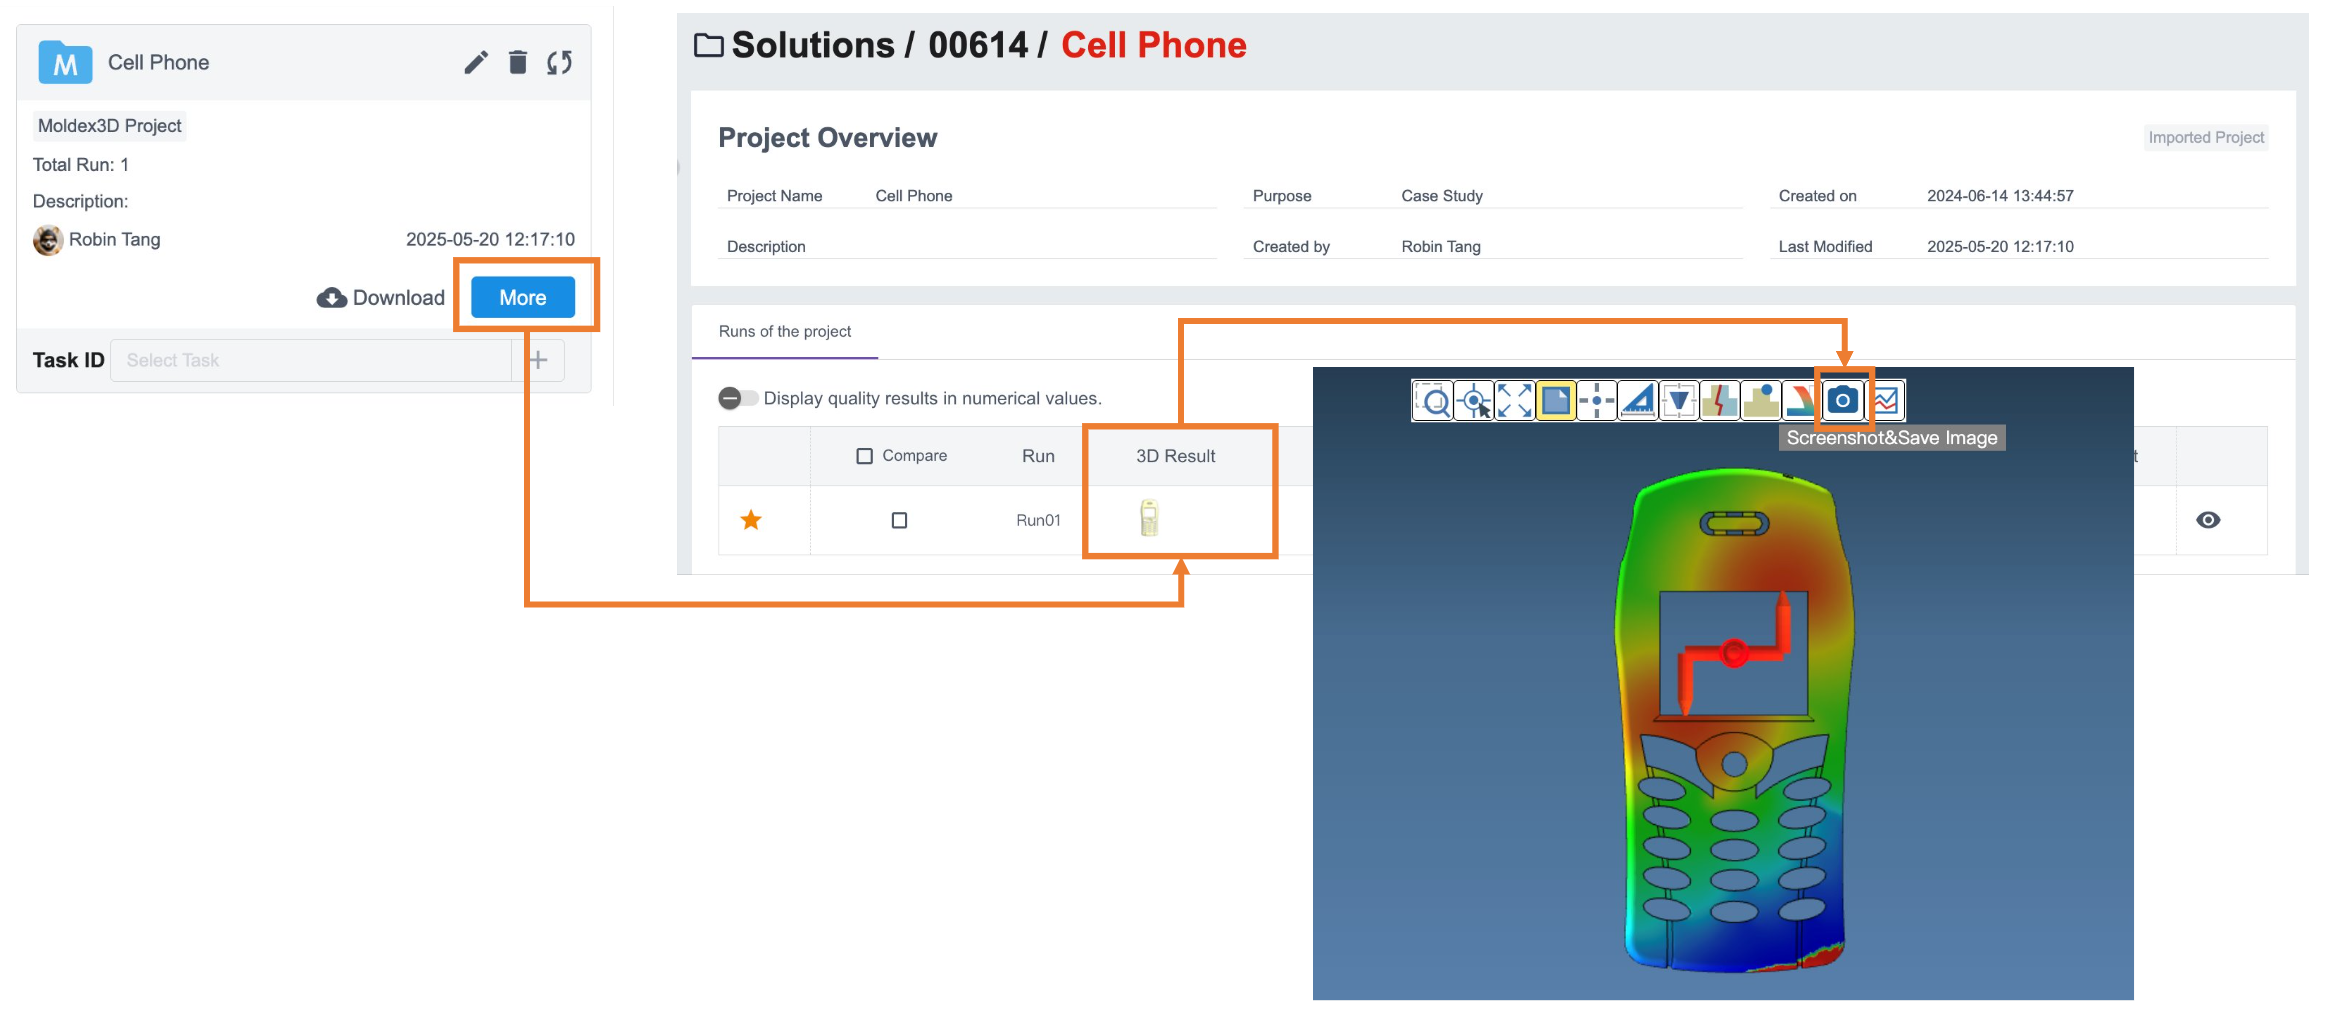
當專案上傳至 iSLM 後無法顯示模型圖片,通常與以下幾個原因有關:
- 未安裝瀏覽器
– iSLM 擷取模型截圖時需透過瀏覽器工具,請確認伺服器上已安裝 Chrome 或 Edge,否則無法產生圖片。
- 專案尚未完成擷取
– 請至 Moldex3D 分頁檢查該專案的狀態,若仍顯示為 Pending 或 Analysis,表示資料擷取尚未完成,因此圖片尚未產生。
- 專案條件不符
– 目前只有「射出成型 (Injection Molding)」類型的專案支援自動截圖,且該專案需包含模型資料(Run 中有模型)。若條件不符,iSLM 將不會產生圖片。
- iSLM 服務未正常運行
– 請使用 iSLM Startup Tool 檢查所有服務是否正常啟動,若服務異常,也會導致截圖功能失效。
若以上條件皆符合,卻仍未出現截圖,則可於該專案的 Project Overview (Solutions > Moldex3D > Project Overview) 頁面中手動擷取圖片,完成後專案列表上將會顯示圖片。
- 330 views
- 1 answers
- 0 votes
-
該網路資料夾在同步時無法成功上傳專案,很可能是因為尚未將其設為掛載磁碟機。
iSLM Personal Mode 綁定的資料夾路徑,必須是有對應磁碟機代號的完整路徑(例如:Z:\SharedFolder),系統才能正確讀取與上傳資料。您可以依以下步驟進行設定:
-
-
開啟「檔案總管」,右鍵點選「此電腦」,選擇「連線網路磁碟機」。
-
將網路路徑(例如
\\Server\SharedFolder)掛載為一個磁碟機代號(例如Z:)。 -
在 iSLM 的設定中,使用
Z:\SharedFolder這樣的路徑來綁定資料夾。
-
*完成後請再依序進行以下的設定:
1. 透過 Microsoft 的 PSTool 將 System 身分掛載網路硬碟
-下載連結: PsExec – Sysinternals | Microsoft Learn
2. 下載並解壓縮後以 管理員身分 使用命令提示字元執行程式,即可使用 System 身分開啟「命令提示字元」的新視窗
–PsExec.exe –i -s cmd
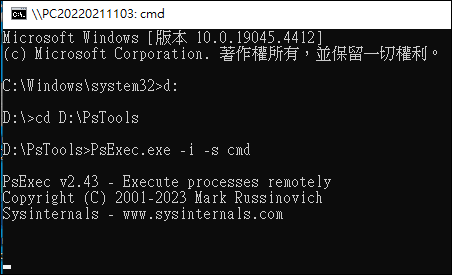
3. 在開啟的 cmd 中可使用 whoami 確認是否為 System 身分

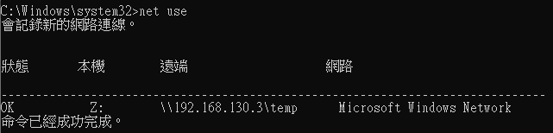
4. 使用以下指令掛載硬碟,並輸入可使用該網路硬碟的帳號密碼;/persistent 能讓電腦重新啟動後自動掛載
– net use $drive+’:’ $path /persistent:yes
– net use Z: \\192.168.130.3\temp / persistent:yes

5. 使用以下指令確認是否有正常掛載硬碟
– net use
- 333 views
- 1 answers
- 0 votes
-
-
可以!
在兩台電腦上都安裝 iSLM Project Sync。登入後,同步在 iSLM 的 Project Sync 頁面中點擊 Add 按鈕綁定這兩台電腦的資料夾路徑。
即可將被綁定的專案資料夾都同步至 iSLM 中。
若不清楚如何綁定資料夾路徑,請參照 Help: 4-1 Project Sync 的章節
This answer accepted by Robin. on 7 8 月, 2025 Earned 0 points.
- 382 views
- 1 answers
- 0 votes
-
當發生「找不到本地專案」的狀況時,將原專案放回本地資料夾,即可解決此問題。
若是確定該專案已不需再同步至 iSLM 時,除在本地端資料夾中刪除該筆專案資料外,也請至 Management > Solutions > Moldex3D 頁面中將該筆同步專案刪除,以確保資料一致性。
This answer accepted by Robin. on 18 8 月, 2025 Earned 0 points.
- 366 views
- 1 answers
- 0 votes
-
是可以的,原本使用 iSLM Personal Mode 的使用者可以直接安裝改用 Server Mode。不過,我們不建議直接升級,原因如下:
- Personal Mode 是透過「同步」的方式,將本地資料夾中的檔案上傳並建立專案,實際的專案資料仍保留在本地端。
- Server Mode 是透過上傳或建立 Simulation Workflow 專案,並由系統將專案完整儲存至 iSLM Database(iSLM DB)中。
若在 Personal Mode 已同步的情況下直接轉用 Server Mode,可能會出現風險:
如果本地資料夾中的原始檔案遺失或損壞,iSLM 將無法正確載入該筆專案,進而可能導致需要重新建立該專案。
- 313 views
- 1 answers
- 0 votes
-
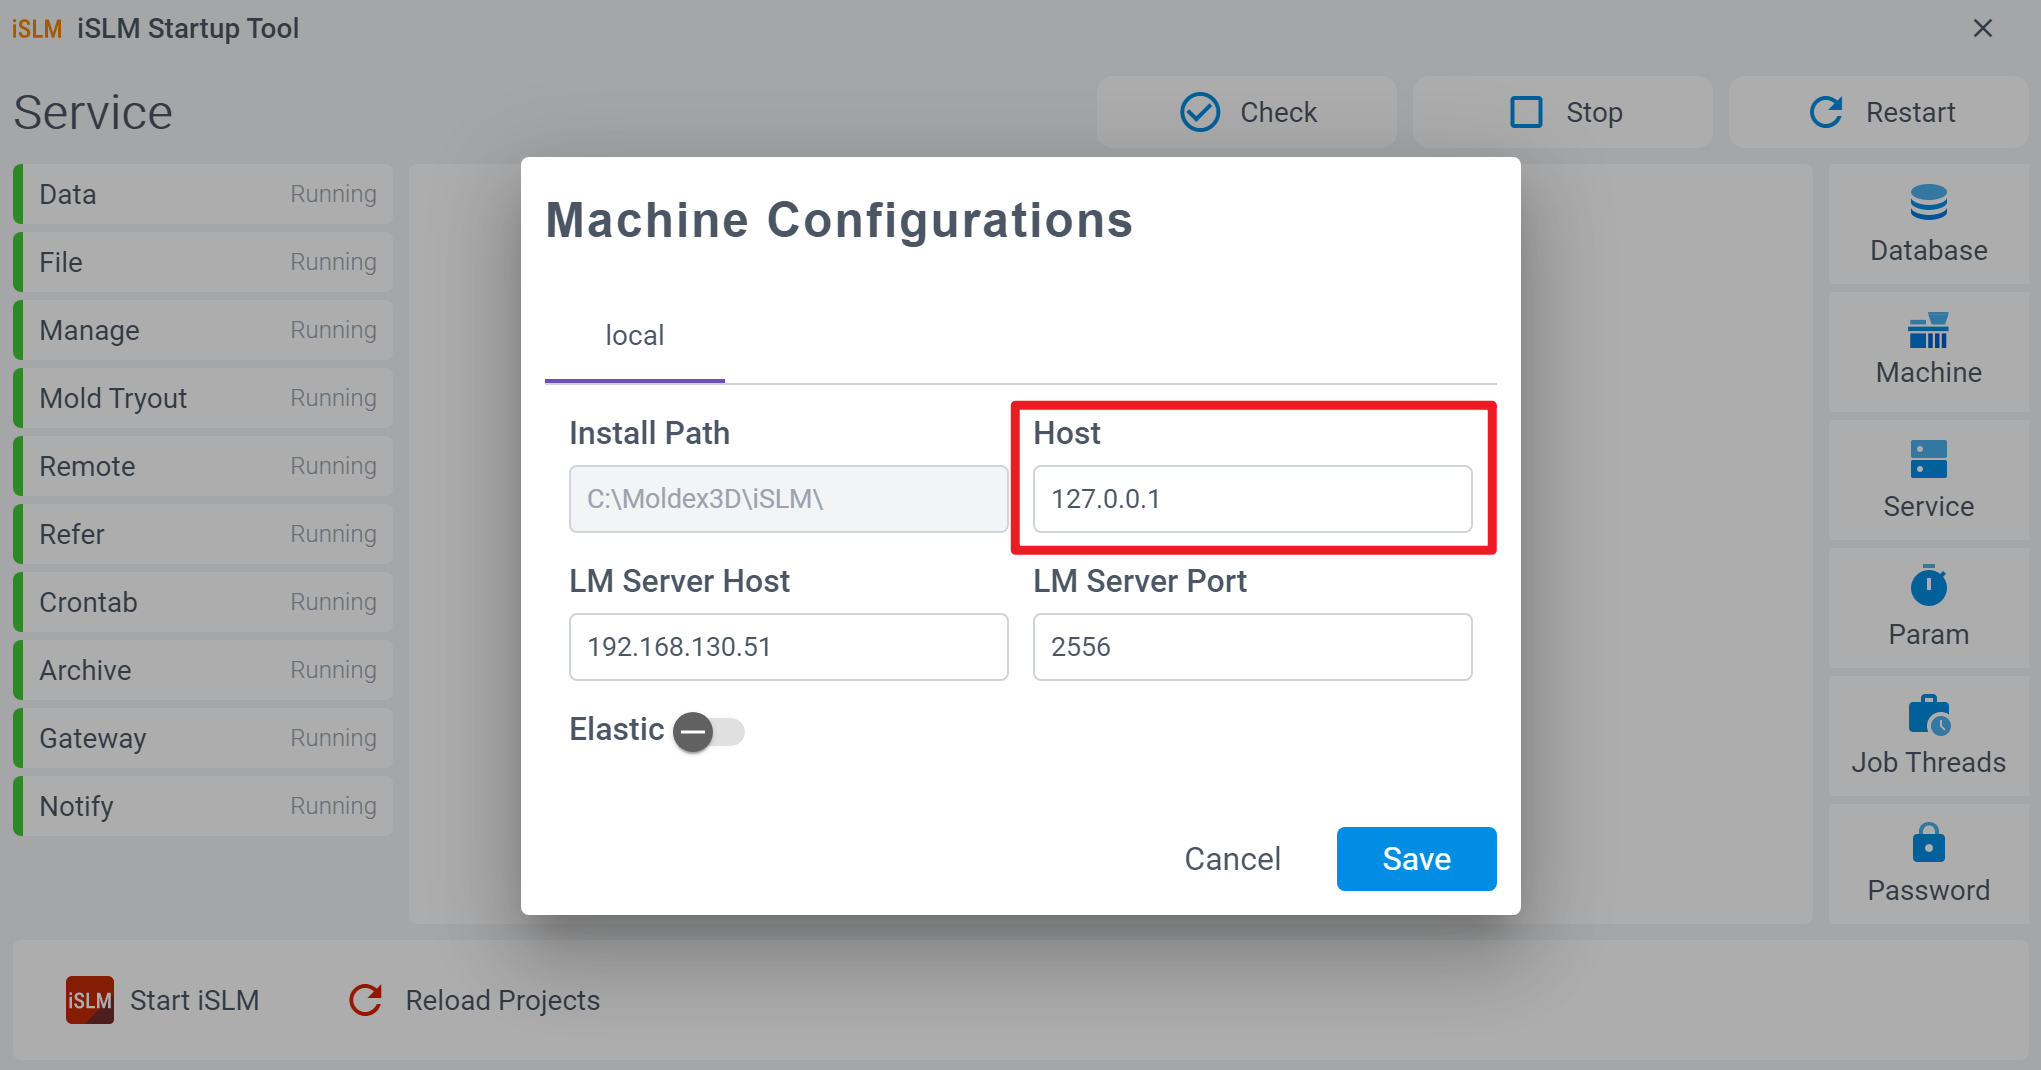
您可在 iSLM Startup Tool > Machine 中的 Host 欄位更改 IP 設定,即可更換 iSLM 站台的 IP
This answer accepted by Robin. on 17 11 月, 2025 Earned 0 points.
- 356 views
- 1 answers
- 0 votes
-
在 Personal Mode 下,iSLM 只會在本機位址 127.0.0.1(也稱為 localhost)啟動。這個位址代表的是「目前使用的裝置本身」,因此當手機瀏覽器開啟 127.0.0.1 時,指的是手機本身,而非電腦的本機位址。
因此,手機無法像 Server Mode 一樣直接透過瀏覽器開啟 iSLM 並進行操作。若真的需要在手機上使用 iSLM,可以考慮透過遠端桌面應用程式連接電腦來操作。
- 420 views
- 1 answers
- 0 votes
-
1. What exactly are the functions of these two options?
These two options mainly manage the deployment and connection between the iSLM main application and the database.
– The database and machine functions in the iSLM Startup Tool allow users to deploy the database on a separate machine.
– This enables the main application (e.g., installed on Machine A) to connect to the database installed on another machine (e.g., Machine B) via the network.
– This feature was designed because the hardware requirements for the database may differ from those of the main application, or you may need to replace the database machine due to storage constraints.
– The iSLM Startup Tool helps IT teams more easily manage the hardware infrastructure and resources.
*Note: Please note that this setup is only supported in Server Mode. If you’re using iSLM in Personal Mode, both the main application and the database must be installed on the same computer.
2. More specifically, is it possible to use these settings to access data from another machine on the same network?
Yes, this setup is specifically designed for that purpose.
– When installing iSLM, the main application and database can be installed on the same computer or on separate computers.
– If installed on the same machine, the Startup Tool automatically sets both to use the same local IP to ensure communication.
– If you move the database to another machine, you simply update the database’s IP address via the Startup Tool, allowing the main application to connect to the database on the new machine without manual configuration changes.
– Therefore, as long as the two machines are on the same network, this mechanism enables seamless data access.
- 3403 views
- 1 answers
- 0 votes
-
iSLM Solution 是用來整合 CAE 分析數據 與 實際試模(Mold Tryout)資料的核心單位。當使用者建立一個新的 Solution 時,系統會同時自動建立第一筆試模資料 (Mold Tryout)。 此設計是為了讓 CAE 分析數據與現場試模結果能夠集中在同一個結構底下,方便後續進行比對與追蹤。
簡單來說,試模紀錄是附加在 Solution 底下的,每新增一次試模紀錄(例如 T0、T1),就會在該 Solution 下累積記錄一次,並同步顯示在 Solutions > Mold Tryout 頁面。
此外,專案數量和試模數量是分開統計的,且邏輯上不太一樣:
- 初始只建立一個專案時,統計的就是該專案本身的數量
- 而試模數量是根據實際有沒有在專案下新增試模紀錄來計算:
1. 如果專案建立後沒有新增任何試模,這個專案的試模數就是 0
2. 如果後續新增了 T0、T1 兩次試模,則試模次數就會記錄為 2
- 326 views
- 1 answers
- 0 votes


