

- Jill
Questions
0
Answers
121
-
當出現此訊息時,請嘗試重新啟動 Moldex3D iSLM Startup Tool 程式,即可解決問題。
- 285 views
- 1 answers
- 0 votes
-
- 268 views
- 1 answers
- 0 votes
-
可以!
若您透過 iSCSI 的方式掛載 NAS 硬碟的話,就可以把 NAS 視為本地路徑,以此方式就能將 iSLM 安裝在 NAS 中。
*注意:
iSLM 之所以無法安裝在 NAS 中主因為 MongoDB 不支援把檔案放在網路的路徑上,所以才無法支援。
- 278 views
- 1 answers
- 0 votes
-
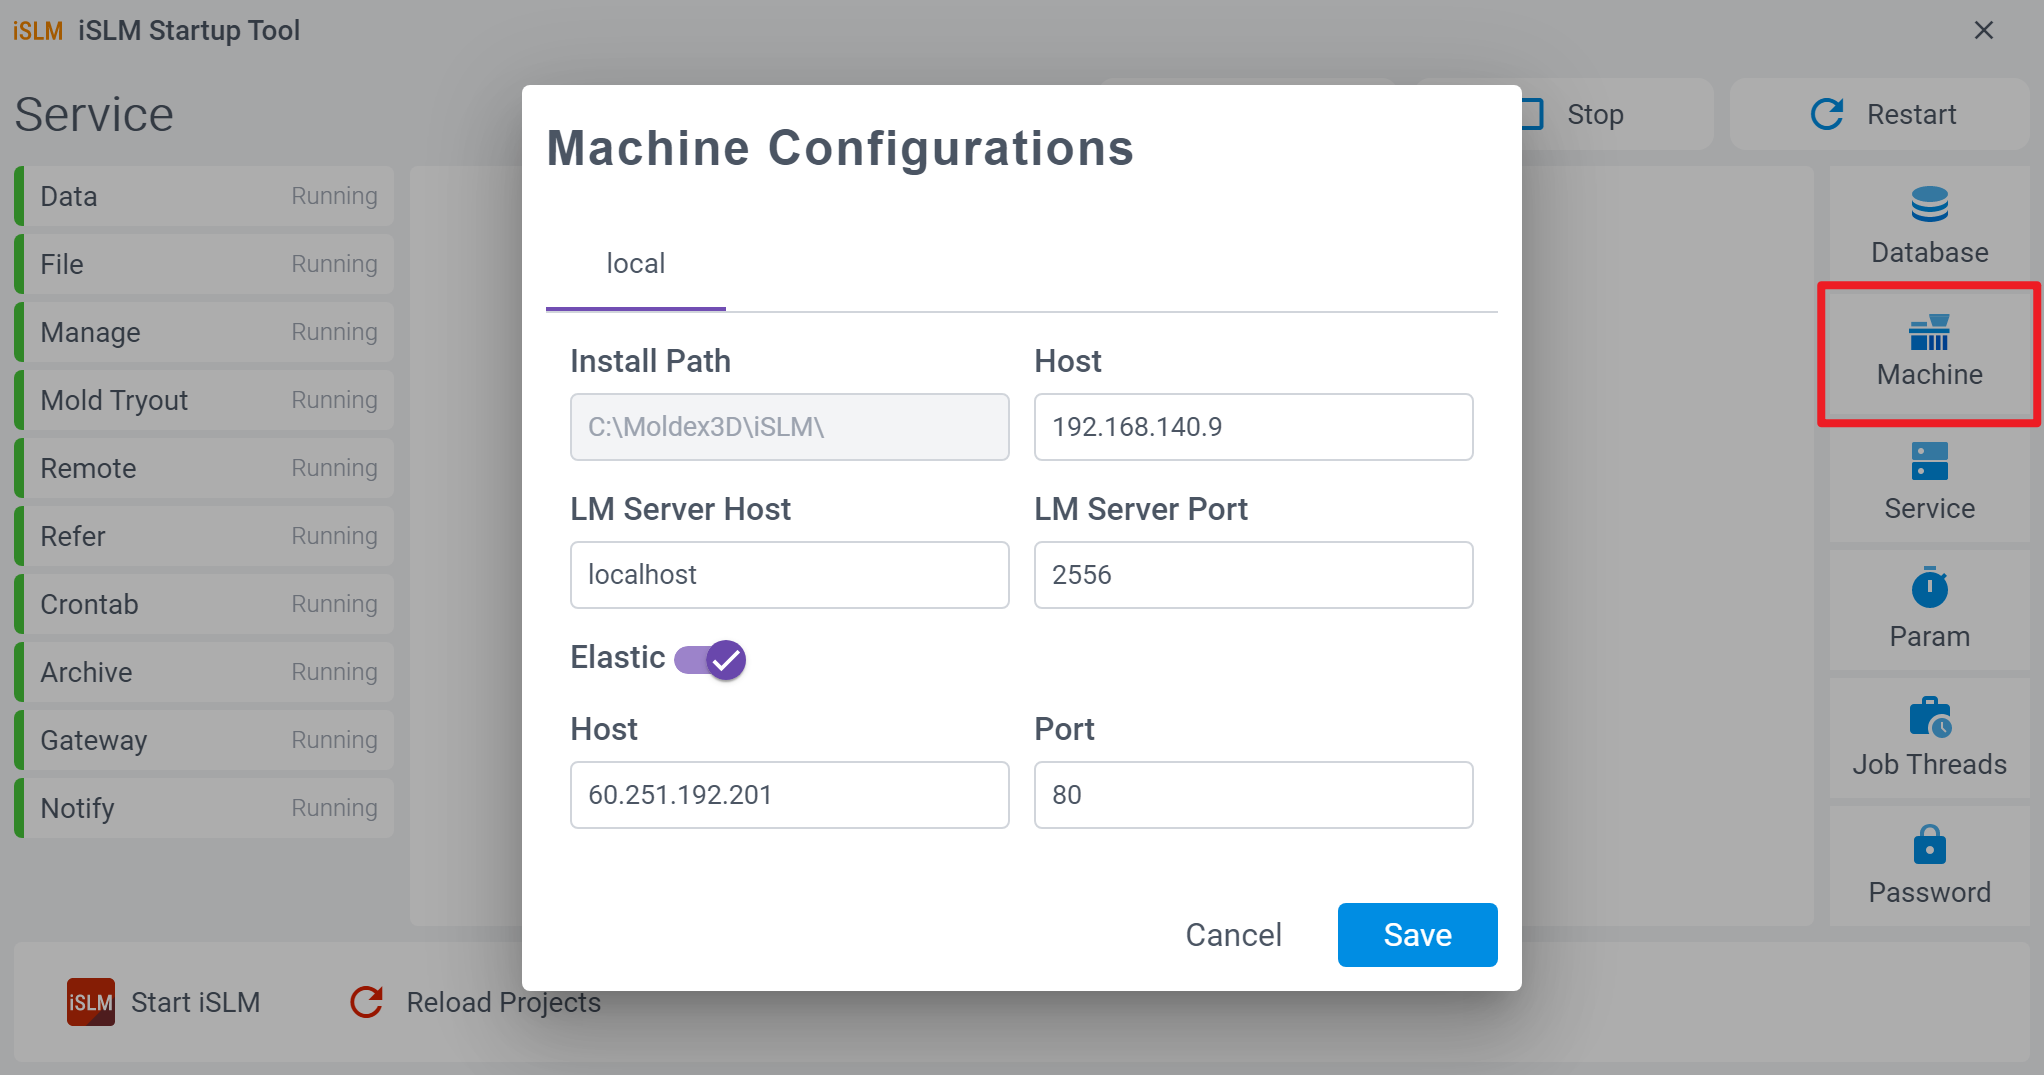
您可透過以下的設定以解決此問題:
1. 開啟 Moldex3D iSLM Startup Tool 並點擊 Machine
2. – Host 欄位輸入 “192.168.140.9”
– LM Server 欄位輸入 “localhost”
– LM Server Port 欄位輸入 “2556”
– 開啟 Elastic 開關
– Host 欄位輸入 “60.251.192.201” (外部的 IP)
– Port 欄位輸入 “80” (外部的 Port)
- 358 views
- 1 answers
- 0 votes
-
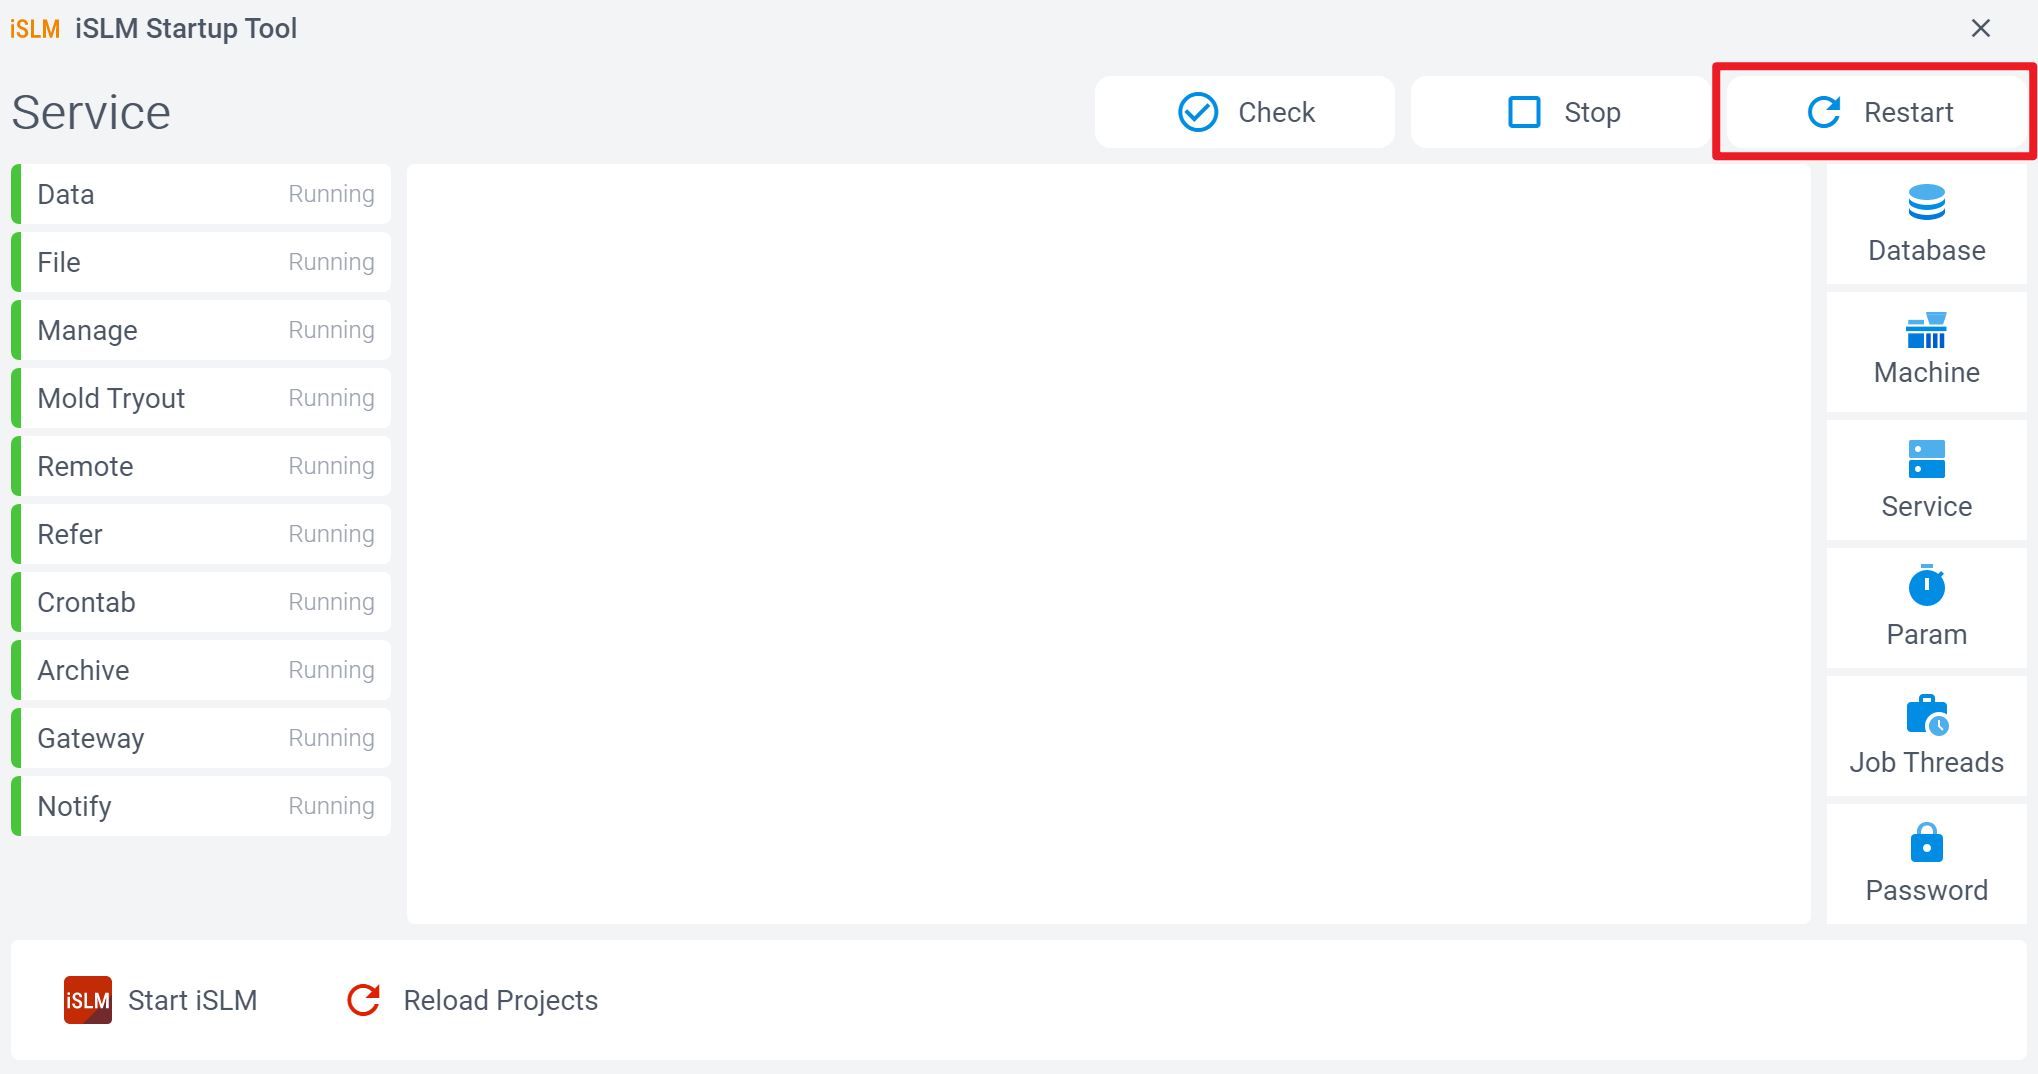
若出現此錯誤訊息,請重新啟動服務以解決問題
*重啟服務步驟:
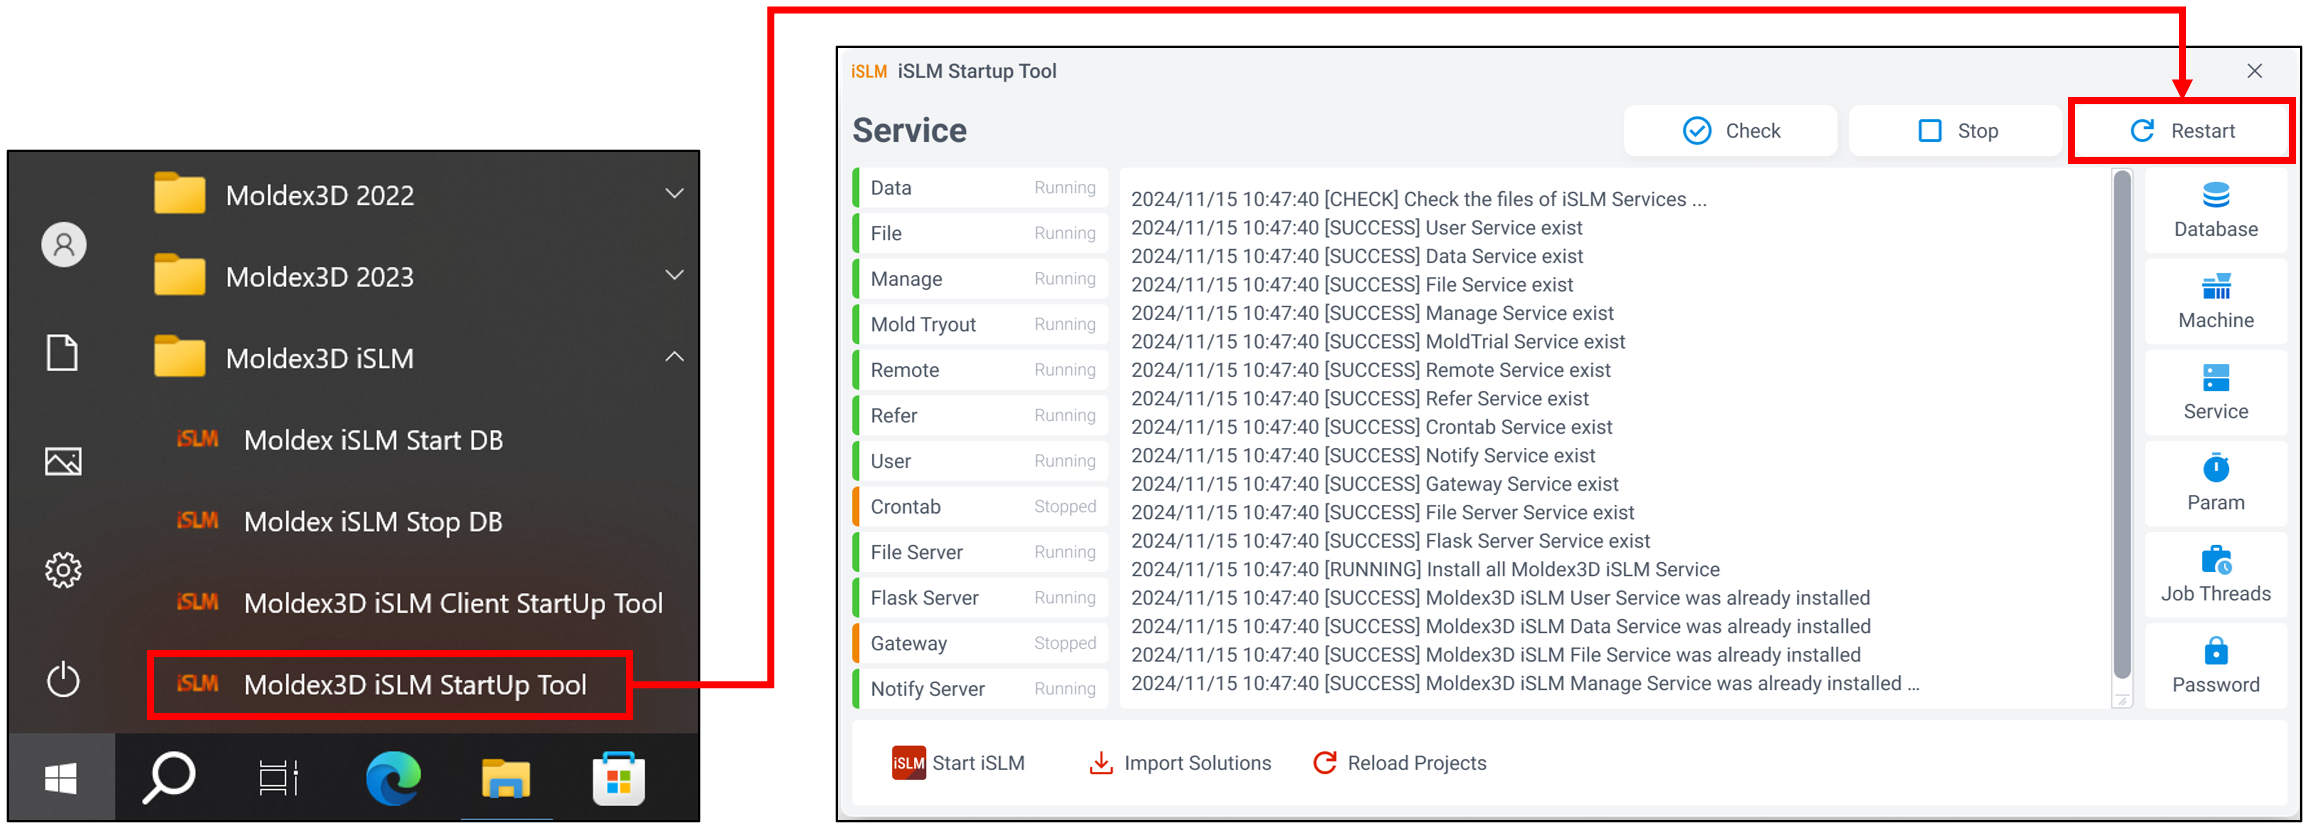
1. 從 Start Menu 開啟 Moldex3D iSLM Startup Tool
2. 點擊 Restart 即可重啟服務
- 298 views
- 1 answers
- 0 votes
-
若遇到此問題,請先確認 Moldex3D iSLM 的 服務狀態 與 相關 Log。
首先,請協助確認系統上 Moldex3D iSLM 的各項服務是否有正常啟動:
1. 如何確認?
- 開啟 Startup Tool 並檢查服務狀態,若無法判斷,請開啟 工作管理員 → 服務 (Services),尋找名稱包含 Moldex3D iSLM 的服務,確認狀態是否為「正在執行」。
- 若 Crontab 未啟動,通常會造成目前觀察到的異常。
2. Crontab 未啟動的可能原因:
- 系統重開機時,iSLM 尚在啟動過程中,使用者手動關閉或強制關閉 Console,導致服務中斷。
- 啟動過程中資料庫連線被中斷,可能情況包括:
– 防毒軟體或防火牆干擾
– DNS / Hostname 解析變動造成 DB 連線異常
– 網路中間層(防火牆、VPN、NAT)閒置後重置 TCP 連線(MongoDB 使用 TCP)
3. 可用來確認的 Log:
請依下列路徑檢視紀錄,以確認服務中斷或異常的原因:
- iSLM 安裝目錄下的
runtime/log - iSLM DB 安裝目錄下的 Log(MongoDB log)
ProgramData\CoreTechSystem\Moldex3D iSLM下的 Log
- 390 views
- 1 answers
- 0 votes
-
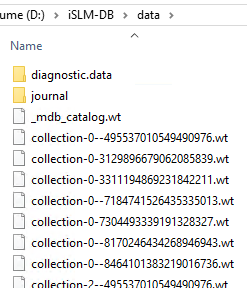
由於您將 iSLMDB 的資料資料夾直接設在 C 槽,而非預設的 C:\Moldex3D\iSLM-DB\data ,因此導致 C 槽出現許多不明檔案與資料夾,也可能因此誤刪部分資料庫檔案,造成 DB 無法啟動。
建議您重新安裝,並將 iSLMDB 的資料資料夾設定在 iSLMDB 系統資料夾下的 data 目錄,或設定到其他資料夾,但請勿設在 C:\。
即可正常啟動!
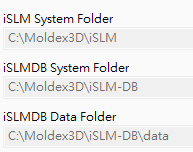
*注意: 以下圖示顯示了 iSLMDB 資料資料夾下應存在的檔案:
- 361 views
- 1 answers
- 0 votes
-
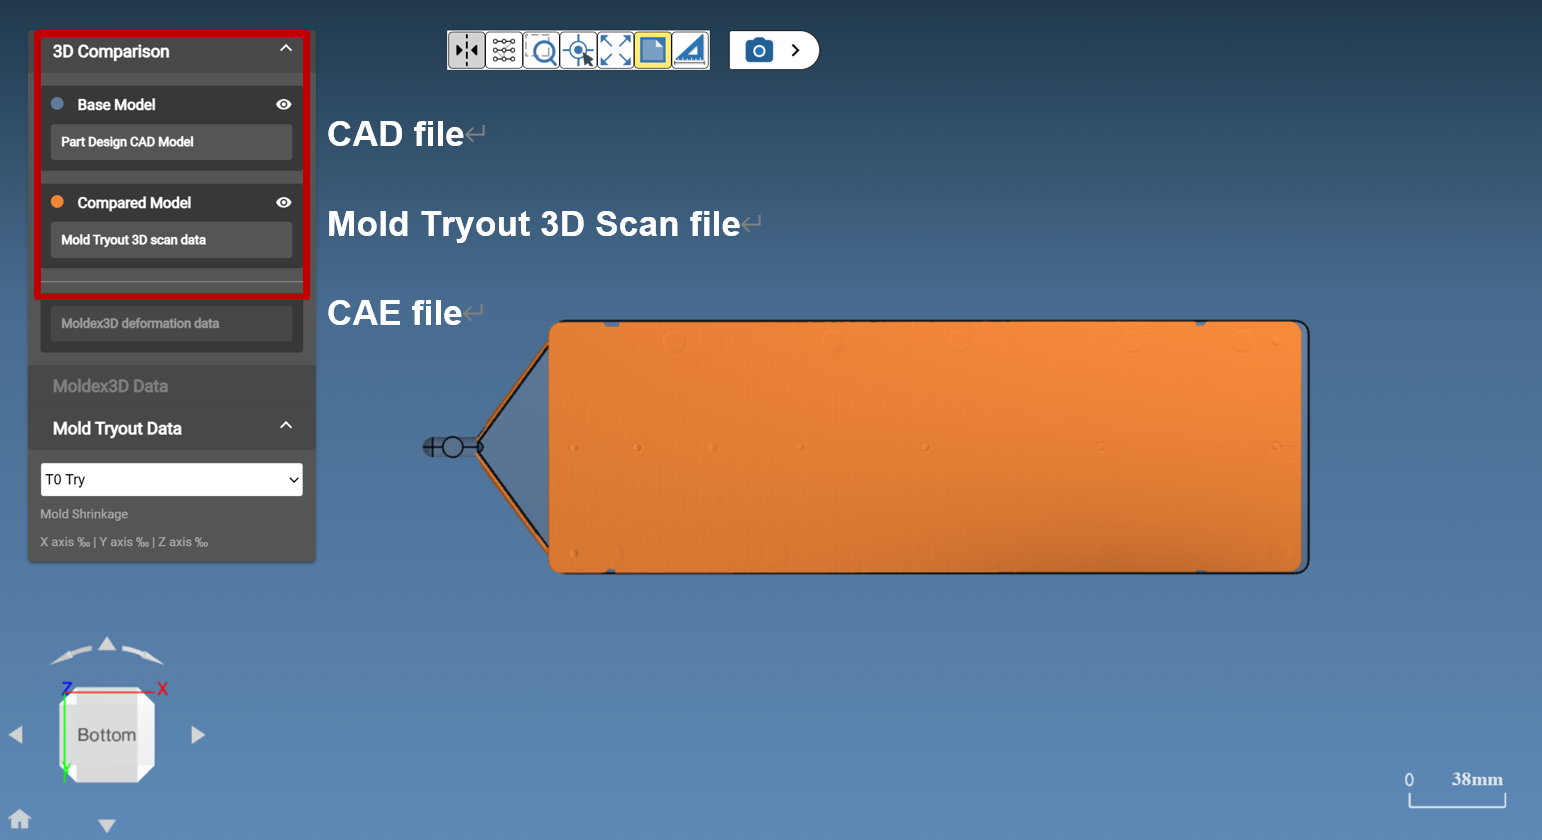
iSLM 支援此功能,可透過 3D 比較功能 在 3D 檢視平台操作模型,並利用功能列選項(如:距離量測、差異計算等)比對兩模型的差異。
支援比較的模型類型包含:- Base Model(原始設計)
- CAE Data(CAE 分析結果)
- Mold Tryout 3D Scan Data(3D 掃描結果)
1. 首先,需在 管理功能 > 專案 > 檢視
 > 檔案 分頁中的 塑件設計 欄位,點擊上傳檔案
  ,上傳原設計圖檔
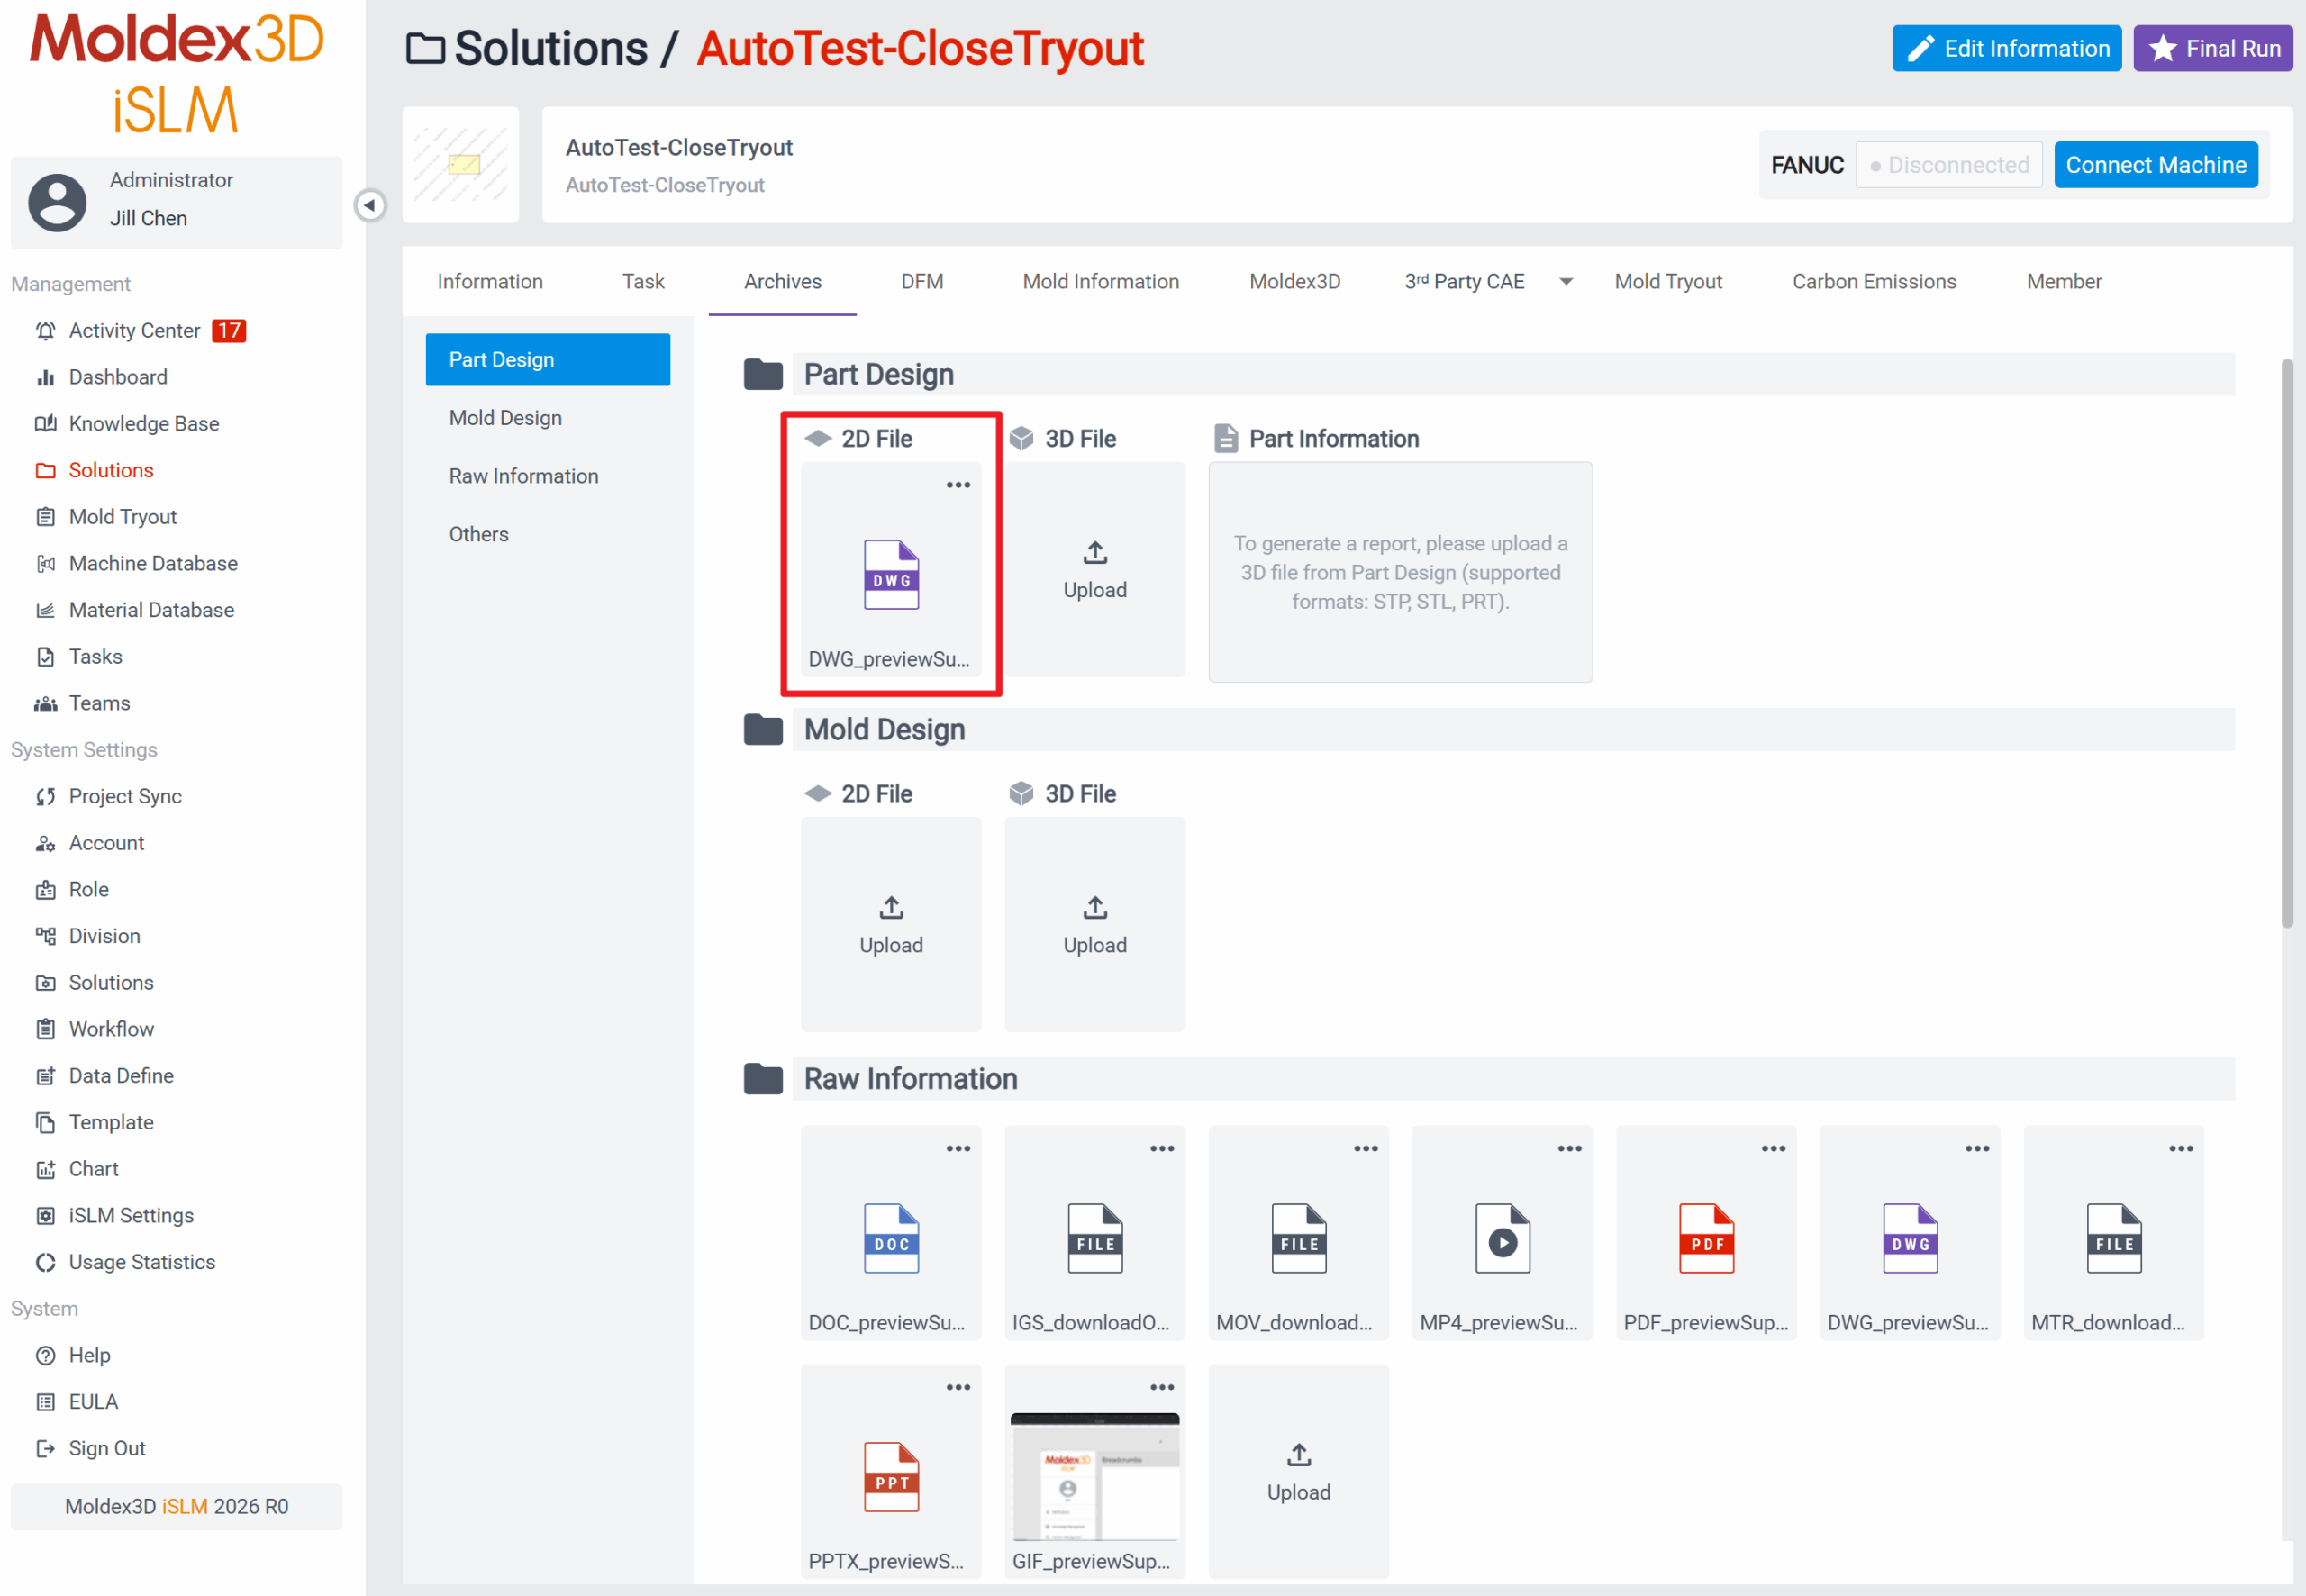
2. 在 管理功能 > 專案 > 檢視 > Moldex3D > 更多 > 檢視
 > 試模 分頁中開啟試模專案,並進入專案點擊 品質檢測 分頁,在 3D Scan 處上傳檔案,完成後就能看到 3D 比較功能 的入口點了。
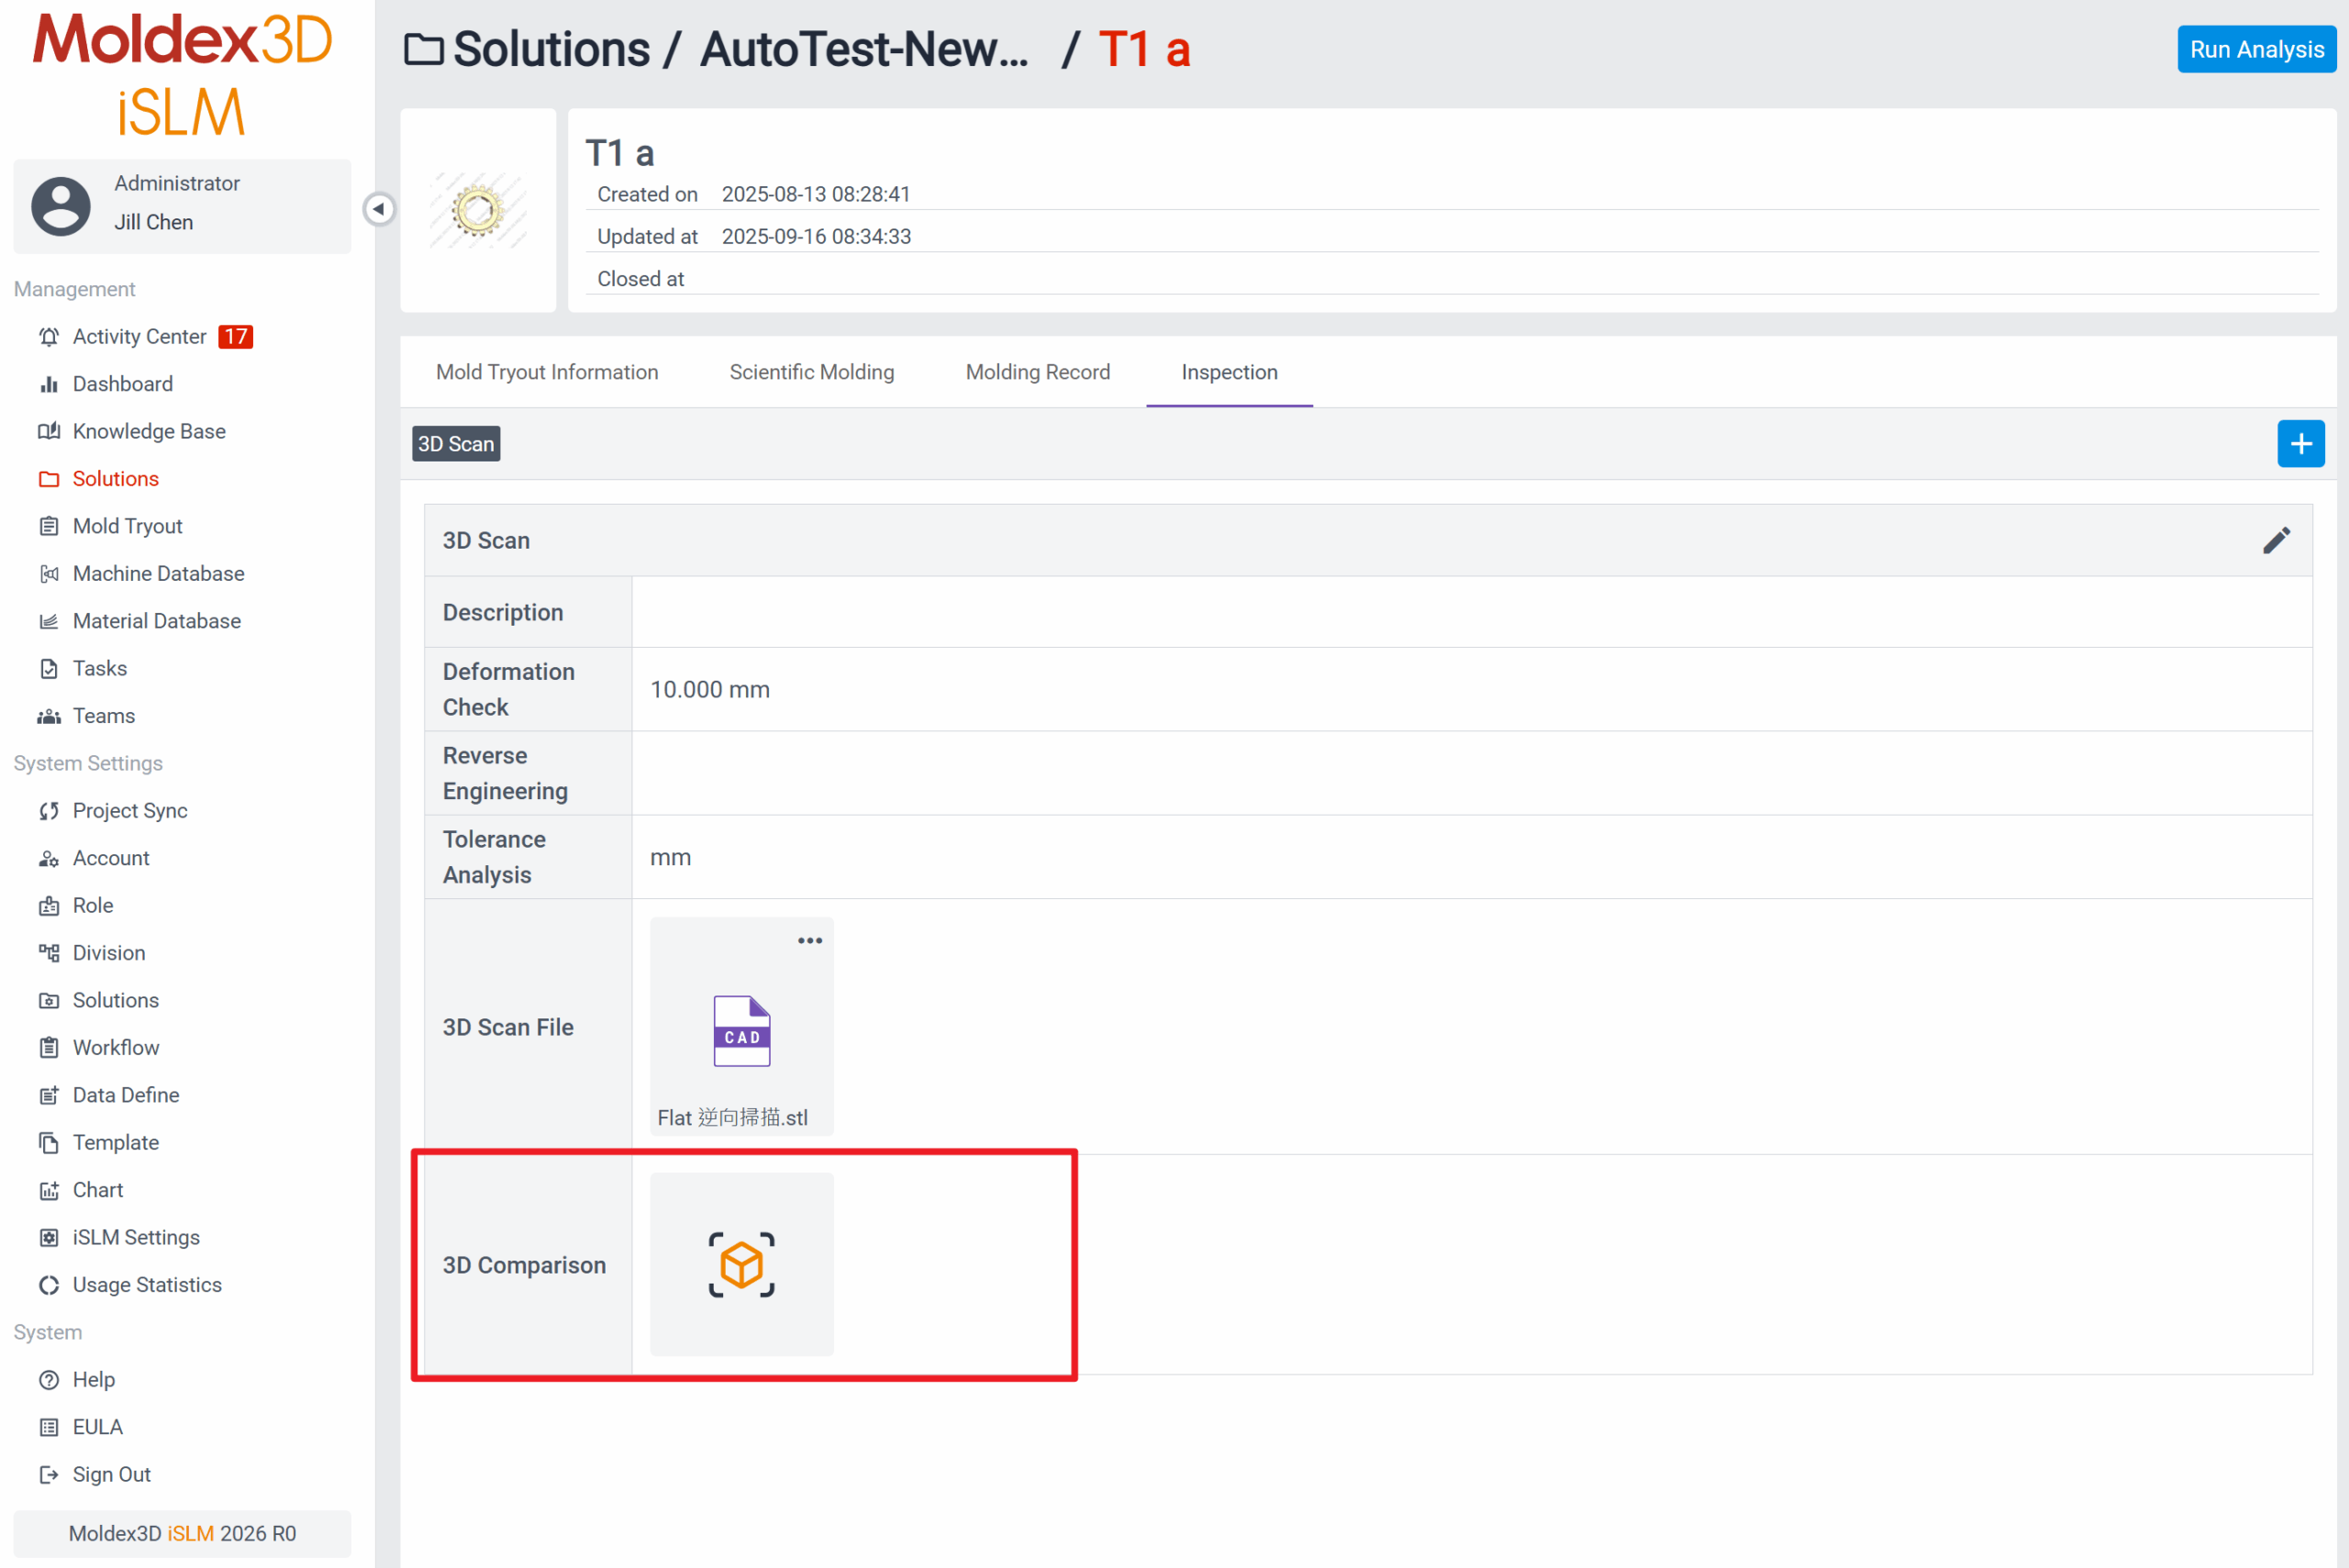
3. 進入 3D Viewer 後,能看到左邊面板的預設 Base Model 為 CAD 設計檔; Compared Model 為逆向 3D 掃描檔 ( STL檔 )。若有 Moldex3D 的 CAE 檔,則會顯示在下方的 Moldex3D 方格中。
另外,可以透過下拉式表單更換試模專案,並開啟該專案的物件於畫面上。
- 347 views
- 1 answers
- 0 votes
-
LDAP 的全名為:「Lightweight Directory Access Protocol」,也就是「輕型目錄存取協定」,是基於 X.500 標準並透過 IP 協定提供存取控制和維護分散式資訊的目錄資訊。其用途可讓您在多項服務中使用同一組帳號密碼,便於您的登入作業。
在完成 系統設定 > iSLM 設定 中的 LDAP 設定後,即可透過 LDAP 匯入所有的帳號資料,並支援調整帳號所屬的部門與角色;此外,如有開啟「自動匯入 LDAP 新建立帳號至 iSLM」 功能的狀況下,當您直接以 AD 帳號密碼登入 iSLM 時,若使用LDAP設定登入成功,系統就會自動建立新帳號,且自動帶入預設的部門、角色以及讀取到的 Email 資訊於新帳號中。
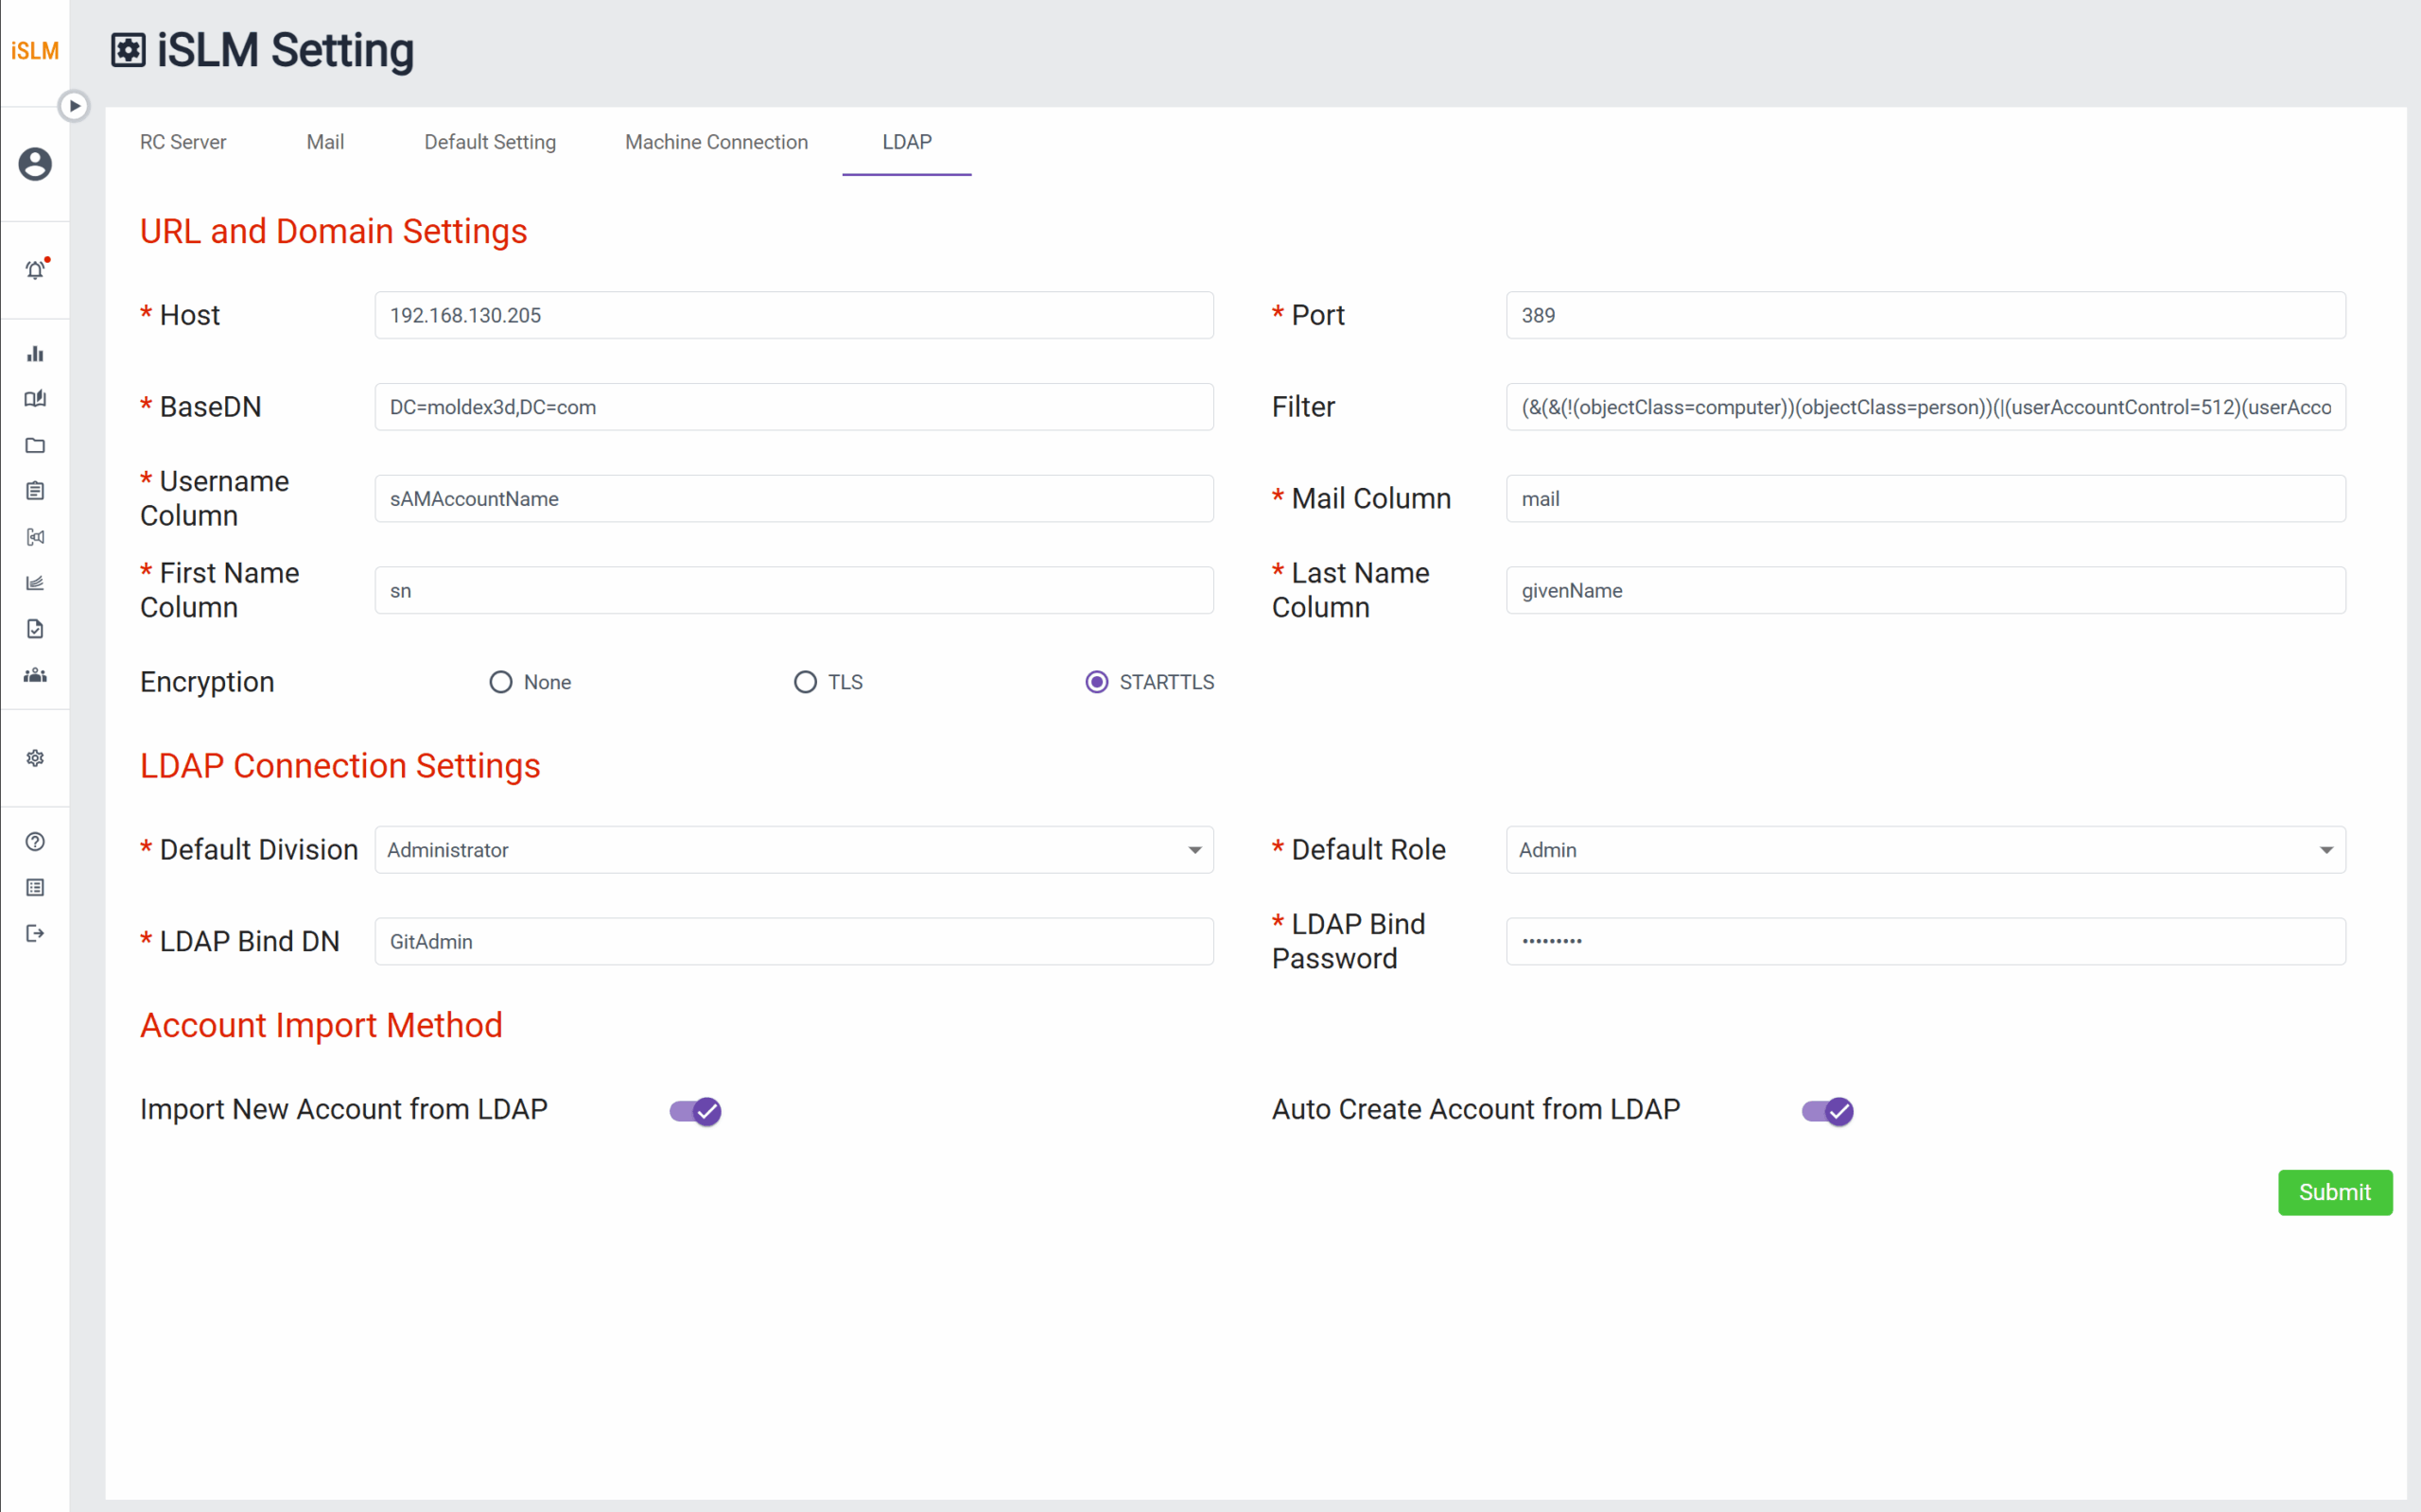
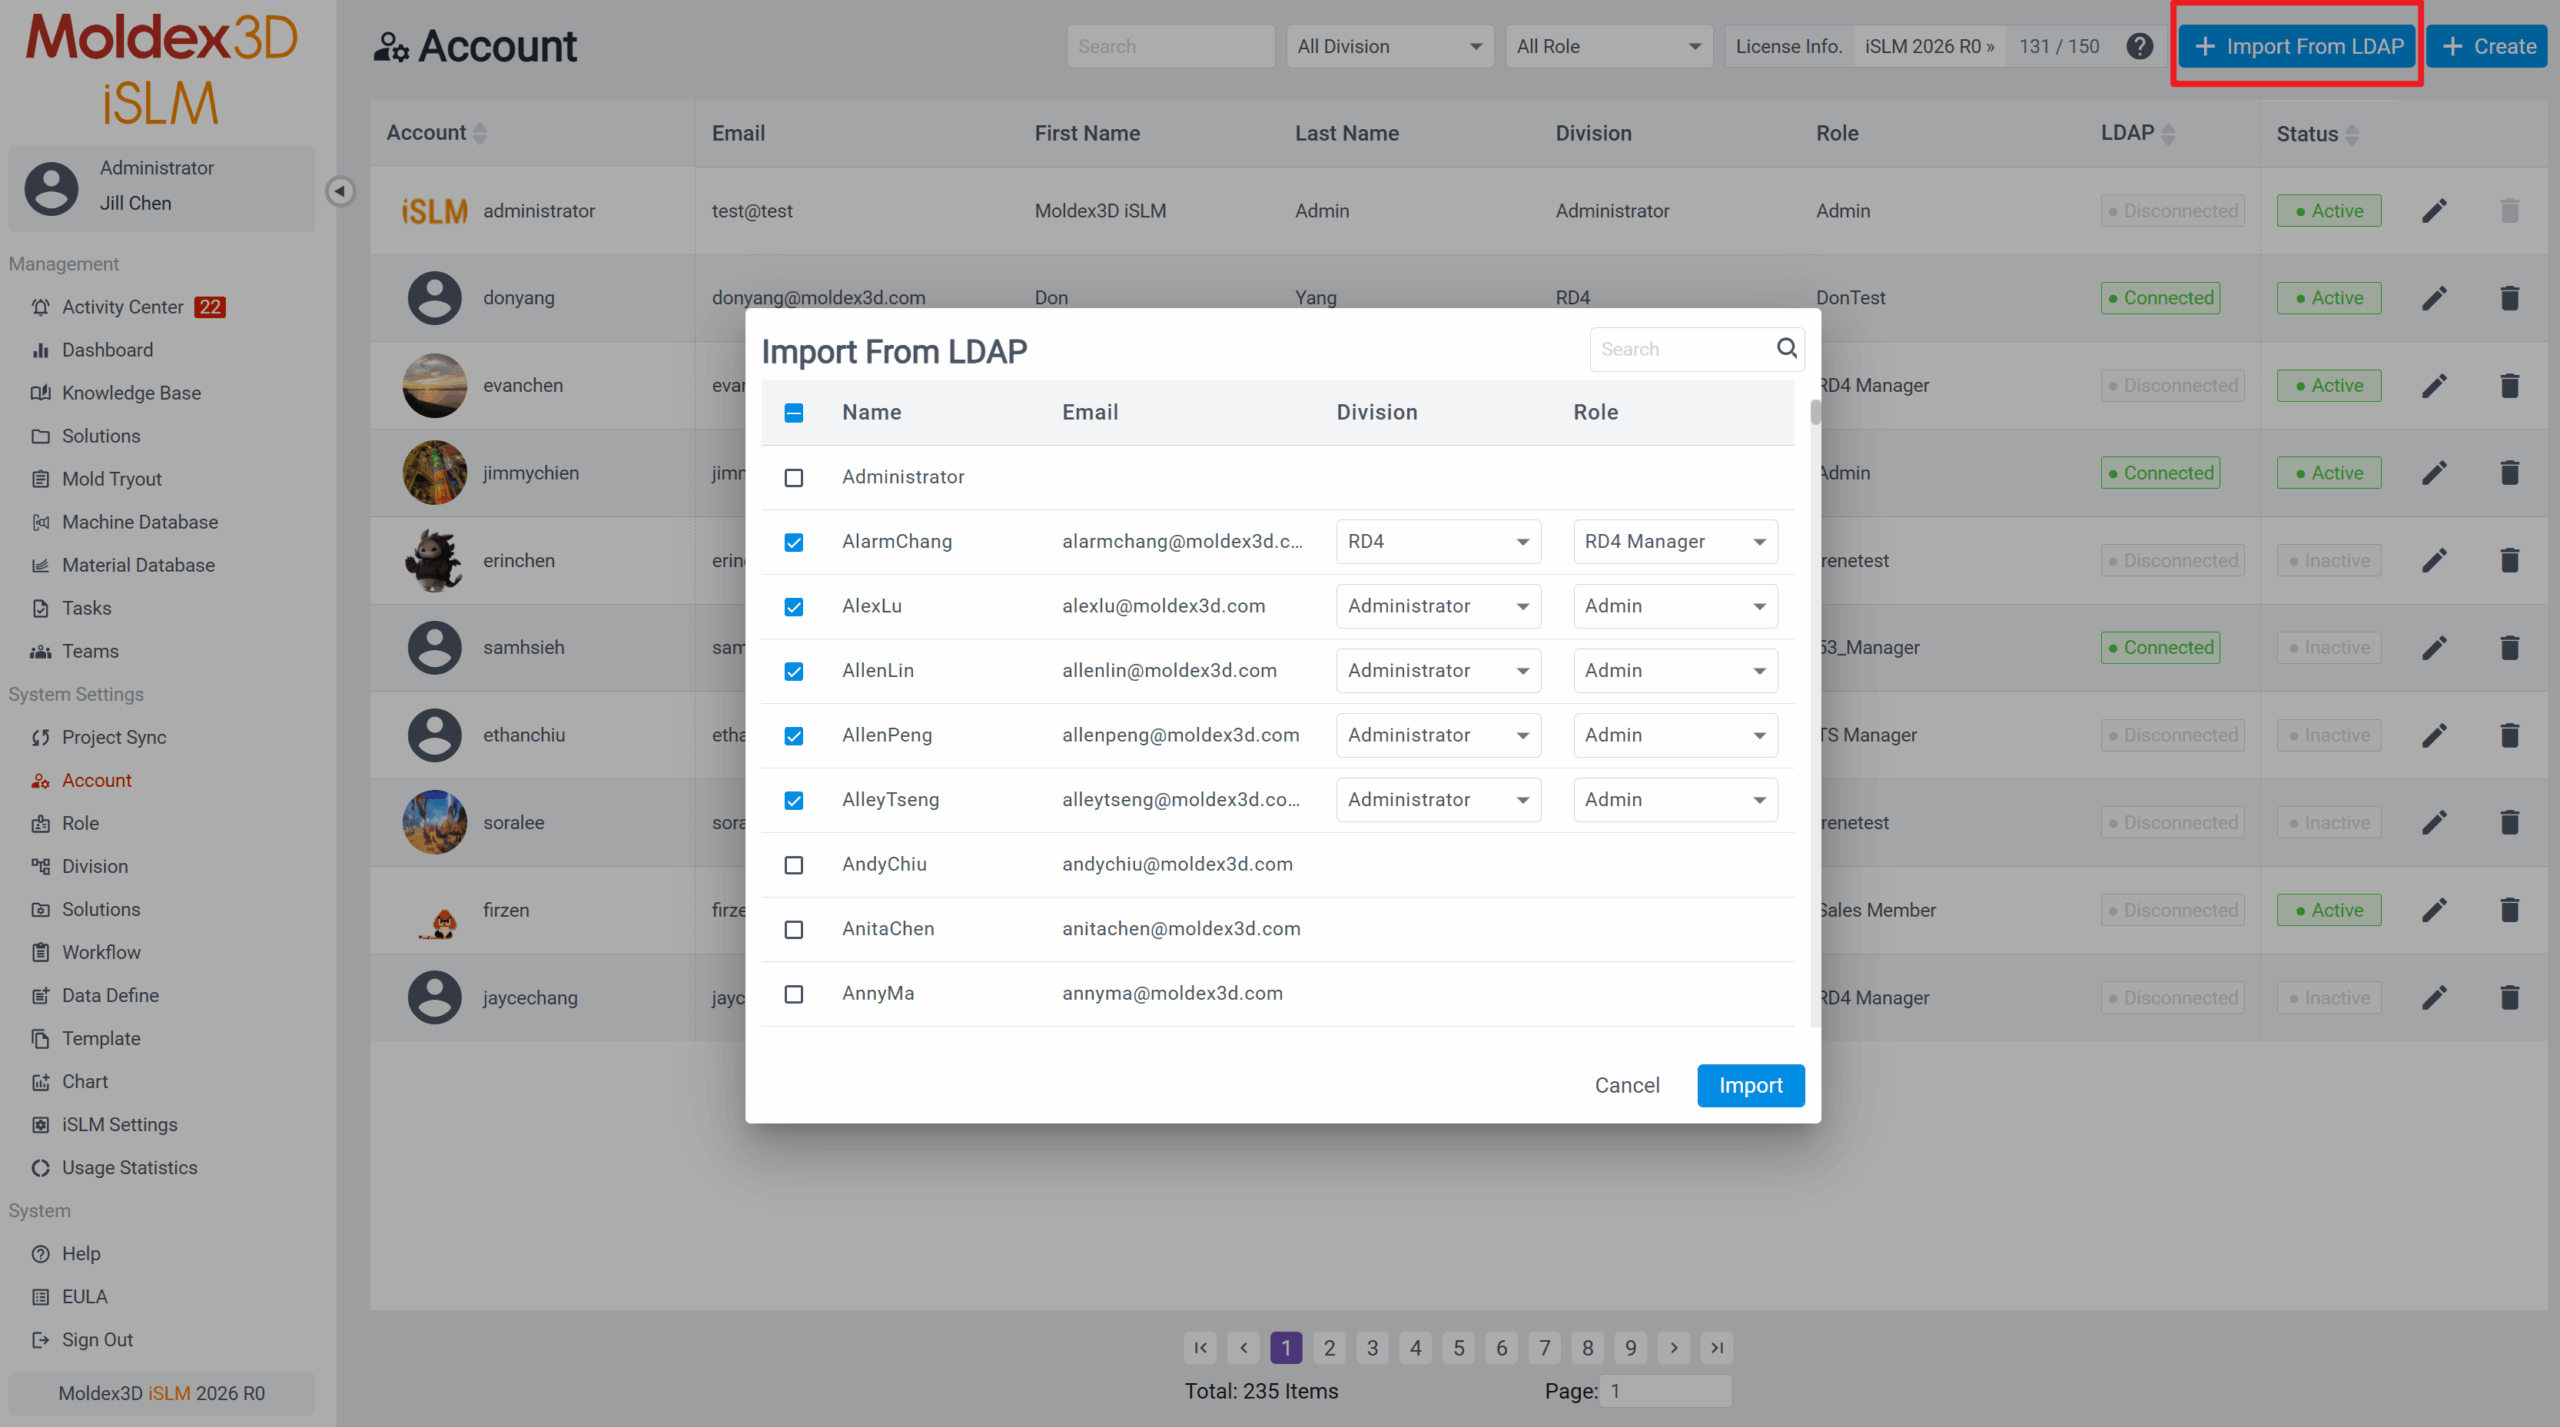
若欲透過 LDAP 匯入帳號至 iSLM 時,請至 系統設定 中的 帳號 頁面,點擊 從 LDAP 匯入 按鈕,即可開啟 LDAP 帳號列表,您可從中自行勾選要匯入哪些帳號。從 LDAP 匯入 按鈕,即可開啟 LDAP 帳號列表,您可從中自行勾選要匯入哪些帳號。需注意匯入的帳號其 部門 和 角色 會預先設定為於 系統設定 > iSLM設定 > LDAP 頁面中設定的 預設部門 和 預設角色。

- 358 views
- 1 answers
- 0 votes
-
此問題是由於網路環境異動後,電腦的 IP 位址改變所造成。安裝 iSLM 時建立的桌面捷徑仍使用原本的 IP(例如安裝時為 A),但環境變更後 IP 變成 B,捷徑卻不會自動更新,因此導致無法正常開啟網站。
請依照以下步驟解決此問題:
1. 先開啟 iSLM Startup Tool,確認 Machine 的 Host 是否已變更。

2. 若確認已變更,請手動編輯桌面捷徑的網址,更新為正確的 Host。
3. 更新後再透過捷徑啟動,即可正常連線至 iSLM 網站。
- 324 views
- 1 answers
- 0 votes


